

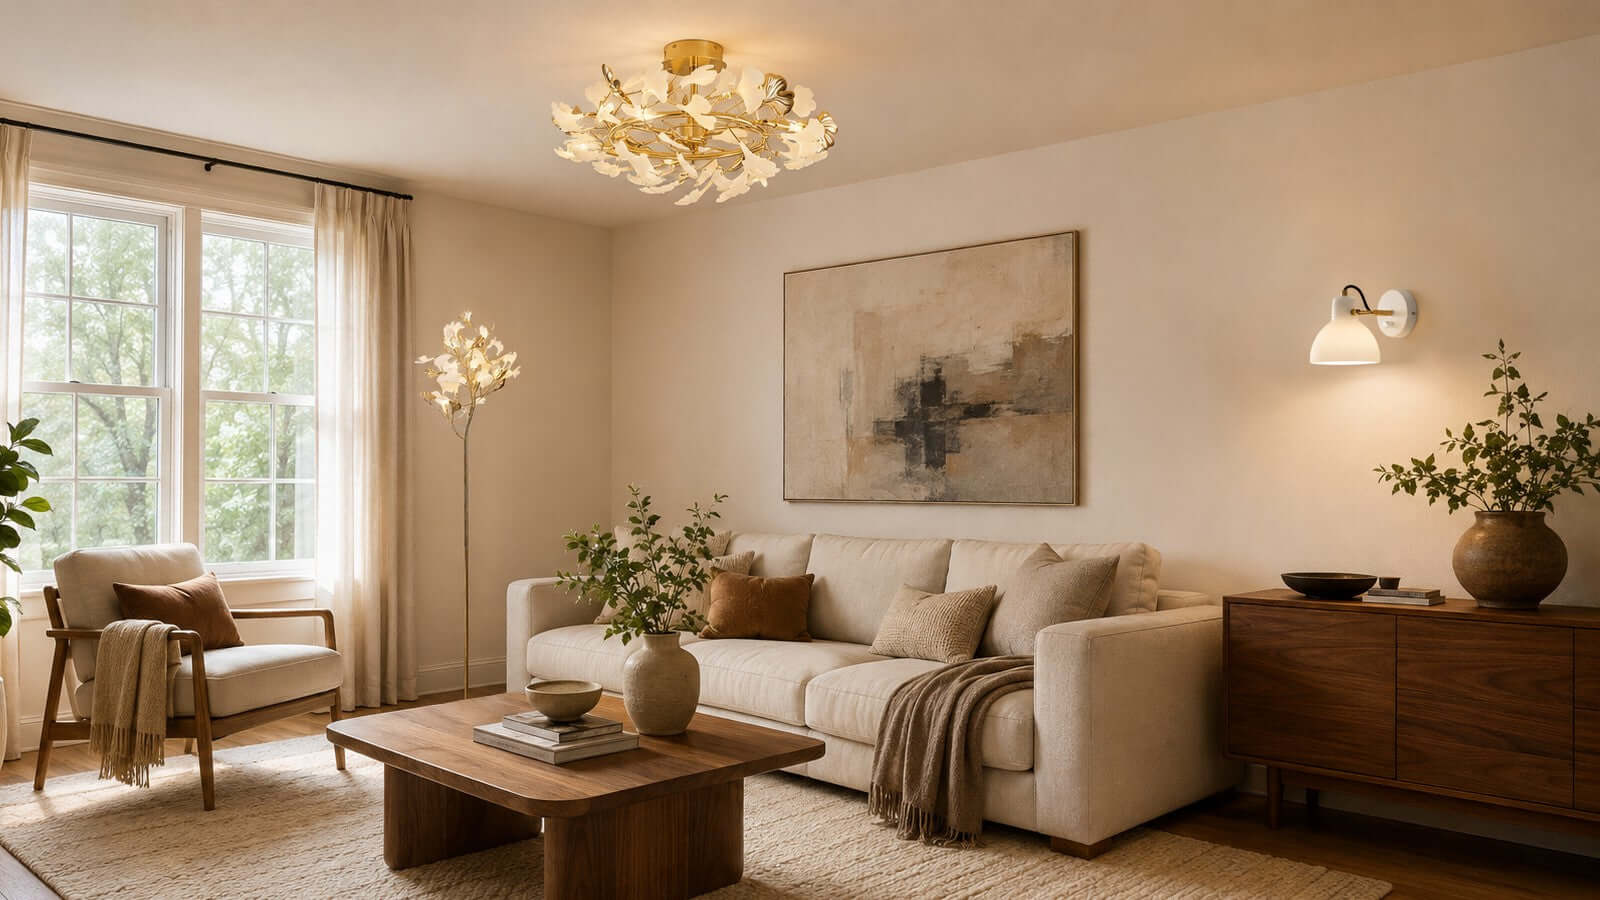
Low-Ceiling Lighting Guide
How to Choose Lighting for Low Ceilings Without Crowding the Room
Low ceilings can make beautiful lighting feel difficult: choose a fixture that hangs too far down and the room feels crowded; choose one that is too small or too flat and the space may feel unfinished. The solution is not to avoid decorative lighting. It is to select a lower profile, use the right visual scale, and distribute light across the room instead of asking one ceiling fixture to do everything.
Quick answer: In open walking areas, plan for roughly 7 feet of clearance beneath a ceiling fixture whenever the room and local requirements allow. For lower ceilings, start with flush mounts or compact semi-flush designs, then add wall and portable lighting to reduce visual weight overhead.

1. Why Low Ceilings Require a Different Lighting Approach
 With an eight-foot ceiling—or anything lower—every inch of fixture height affects how the room feels. A deep chandelier placed in a walkway can interrupt the view, reduce headroom, and pull attention downward. A compact light preserves the vertical space between the floor and ceiling, helping furniture, artwork, and windows remain visually connected.
Low ceilings also make contrast more noticeable. A bulky, dark fixture may appear heavier against a pale ceiling, while a broad but shallow design can distribute its visual presence without hanging into the room. The goal is to balance three things:
- Clearance: Keep open paths comfortable and unobstructed.
- Proportion: Match the fixture's width and depth to the room.
- Light distribution: Avoid relying on a single bright point overhead.
Start with the room, not the fixture. Mark where people walk, sit, cook, read, and gather. A light above a table can hang lower than one positioned in the center of an open passage.
2. Best Types of Light Fixtures for Low-Ceiling Rooms
Flush-Mount Ceiling Lights
These sit directly against or very close to the ceiling. They preserve the most headroom and work especially well in bedrooms, hallways, entries, closets, and compact kitchens.
Compact Semi-Flush Lights
A short drop creates more dimension than a true flush mount while keeping the profile controlled. Always compare the complete fixture height with the available clearance.
Wall Sconces
Sconces move part of the lighting plan away from the ceiling and add depth around mirrors, beds, artwork, seating areas, and hallways.
Table and Floor Lamps
Portable lamps place light closer to reading, relaxing, or working areas. They can make a room feel warmer without adding more visual weight overhead.
Pendant lights are not automatically excluded from a low-ceiling room. A small pendant may work above a kitchen island, dining table, or nightstand because furniture prevents people from walking beneath it. Keep the drop restrained and check the sightline from nearby seating and doorways.
For the strongest combination of clearance and decorative character, begin with Rosso Lighting's ceiling light collection, then build supporting layers with wall sconces and portable lamps.

3. How to Choose the Right Fixture Size and Profile
A low-profile fixture can still have generous width. In fact, a wider, shallower ceiling light often feels better balanced than a tiny fixture in the center of a large room. Measure the room, furniture arrangement, and available ceiling area before focusing on style.
- Measure the finished ceiling height. Include rugs or raised flooring if they noticeably change standing height.
- Identify walking and furniture zones. Open circulation areas need more clearance than the space directly above a bed, island, or dining table.
- Check total fixture height. Include the canopy, decorative frame, shade, and any fixed stem—not only the visible shade.
- Review width against the room. A very narrow light may look undersized, while an oversized dark fixture can dominate the ceiling.
- Create a paper template. Tape the fixture diameter or outline to the ceiling or floor to preview its visual footprint.
Color and material also influence perceived size. Pale stone, opal glass, light fabric, and restrained metalwork may blend more gently with a light ceiling. Dark finishes can still work, but simpler lines and more negative space help prevent the fixture from feeling heavy.
| Design Question | What to Measure | Why It Matters |
|---|---|---|
| Will people walk below it? | Floor to lowest fixture point | Protects comfortable headroom |
| Will it hang above furniture? | Fixture-to-surface distance | Allows a lower focal point where appropriate |
| Does it suit the room? | Fixture width versus room and furniture | Prevents an undersized or overpowering look |
| Will it feel visually heavy? | Profile, finish, frame density, and contrast | Preserves an open ceiling plane |
 4. Using Layered Lighting to Make a Room Feel More Open
A single overhead fixture often creates a bright center and dim edges, which can make the boundaries of a low room feel more obvious. Layered lighting distributes illumination at several heights and gives the eye more places to travel.
Begin with ambient light
Use a flush or compact semi-flush fixture for comfortable general illumination. Choose a scale that relates to the whole room rather than trying to create a dramatic vertical centerpiece.
Add light at eye level
Wall sconces can illuminate vertical surfaces and visually widen the room. Place them in relation to furniture, artwork, mirrors, or architectural features so they feel integrated rather than scattered.
Finish with task and accent light
A table lamp beside a sofa, a floor lamp near a reading chair, or focused lighting over a work surface brings light closer to daily activities. This softer distribution reduces the need for one intense ceiling source.

5. Low-Ceiling Lighting Ideas for Every Room
Living room
Choose a broad, shallow ceiling fixture and support it with a floor lamp beside the main seating group. Wall sconces near artwork or a console can brighten the room's edges. Avoid a large central chandelier unless the furniture plan guarantees suitable clearance.
Bedroom
A flush mount keeps the area around the bed open, while bedside wall lamps or table lamps provide more comfortable reading light. Keep the ceiling fixture visually calm so the bed remains the room's main anchor.
Kitchen
Use a compact ceiling light in open walking areas. Over an island, one restrained linear fixture or a small group of pendants can work because the countertop defines the no-walk zone below. Check sightlines across the kitchen before finalizing the drop.
Dining room
A dining table creates an opportunity for a lower fixture even when the ceiling is modest. Keep the chandelier or pendant proportional to the table, and make sure it does not block conversation or the view into adjoining rooms.
Hallway and entryway
Prioritize clearance with flush mounts or very compact semi-flush designs. In a long hallway, repeated smaller fixtures can create a calmer rhythm than one oversized light. A wall sconce may add warmth where the passage is wide enough for its projection.
Home office
Combine a restrained overhead light with a desk lamp. This keeps the ceiling visually clean while placing useful light close to paperwork, a keyboard, or creative tasks.

6. Common Lighting Mistakes That Make Low Ceilings Feel Crowded
- Choosing by diameter alone: A fixture may be narrow but still hang too far into the room.
- Ignoring the canopy and frame: Product height should include every fixed component.
- Using one oversized statement fixture: In an open walkway, too much vertical mass can make the ceiling feel lower.
- Selecting a fixture that is too small: A tiny ceiling light may leave the room visually unfinished and poorly balanced.
- Creating strong ceiling contrast: A dense, dark fixture against a pale low ceiling can appear heavier than expected.
- Relying only on overhead light: Dark walls and corners can make the room feel tighter.
- Placing pendants in circulation paths: Reserve lower drops for areas protected by tables, islands, or other fixed furniture.
- Skipping a full-size preview: Painter's tape and cardboard templates reveal scale before installation.
Final check: Review the fixture from the room's doorway, main seat, and busiest walking path. A successful low-ceiling light should feel present without becoming the first obstacle the eye notices.
A Simple Low-Ceiling Lighting Checklist
- Measure the finished floor-to-ceiling height.
- Mark every open walking path and furniture-protected area.
- Confirm total fixture height and lowest point.
- Compare fixture width with the room and furniture below.
- Preview the outline with a full-size template.
- Add wall, table, or floor lighting instead of overloading the ceiling.
- Review the manufacturer's current dimensions and installation instructions.
- Confirm the final electrical layout with a qualified installer.
Share:
How Many Pendant Lights Do You Need Over a Kitchen Island?
How to Choose the Right Light Fixture for a Vaulted Ceiling